How To Source Data In a Server Project
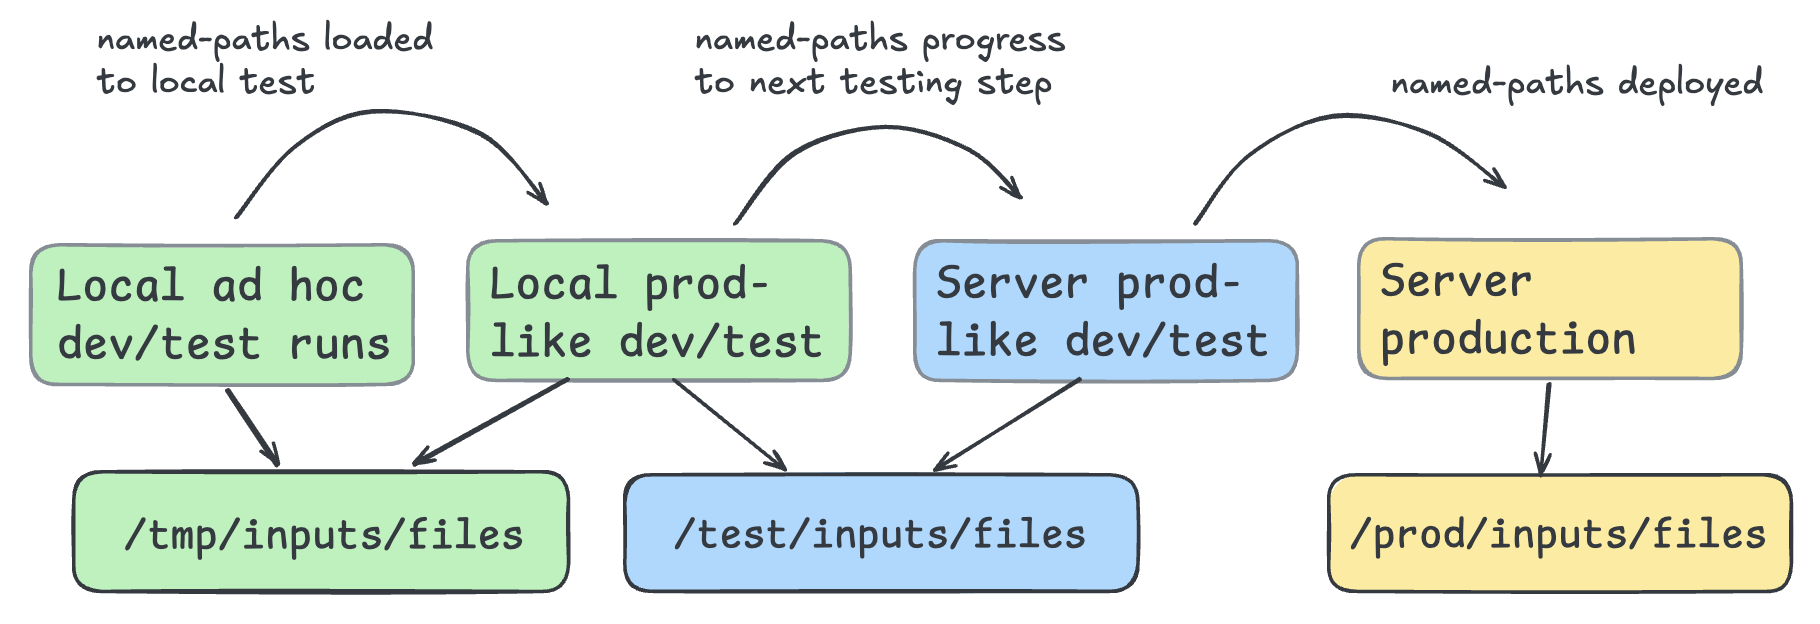
In developing new validations it often helps to have three stages before production: local, production-like local test, production-like server test.
- Local: Creating project files and doing one-off runs without staging or loading steps
- Local production-like: In this step you stage your test data as a named-file stored locally and load your csvpath statements into a locally stored group
- Production-like server: This step runs named-files and named-paths in the server context using registration, csvpaths groups, and archives areas that look like production. Activations or API triggers start runs and webhooks, transfers, or other outbound integrations close runs in the same way it will happen in production.
- Production: The fully automated preboarding process working on managed assets with real data
To make these changes you need to progress four projects step by step. That means syncing config so that staging, loading, and running happen where you want them to.
As you progress your config changes, and load named-files and named-paths groups, you will likely use FlightPath Data to do some of the needed synchronizations. This page shows how simple that is.
What you need
- A FlightPath Server install
- A FlightPath Data install
How to do it
- Start an instance of FlightPath Server as described here
- Open FlightPath Data
- Create a new local project called
localfollowing these instructions - Click the Config button at the bottom-left
- In the Config panel select
inputsin the left hand vertical tabs - Set the
Named-files path or URLfield to a directory on your local hard drive. Let’s say:/tmp/inputs/files
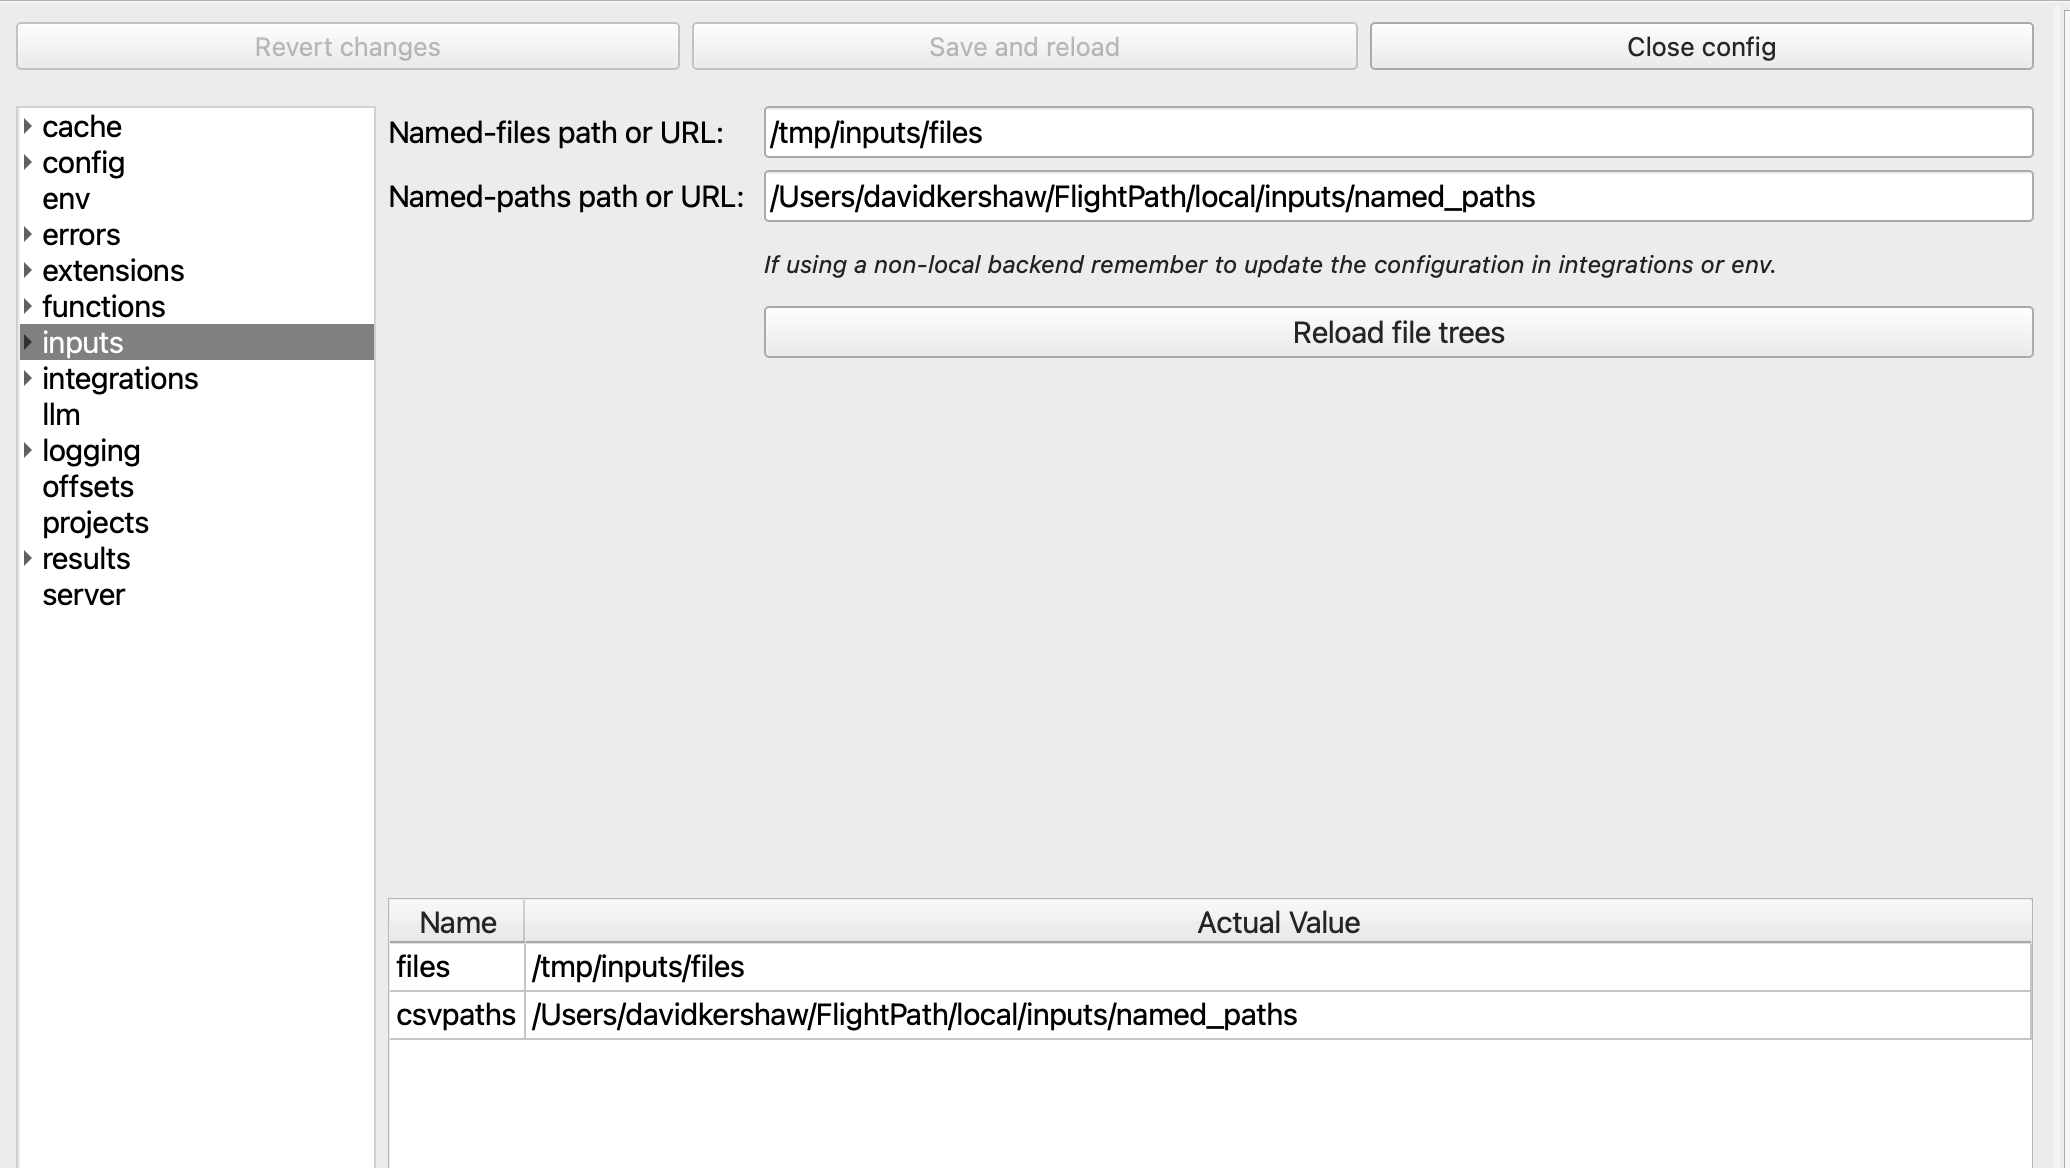
- Click the
Save and reloadbutton at the top of the Config Panel - In the server form add the server URL and port and create an admin key following the instructions here
- With the admin key in the
API keyfield, clickSave and reloadagain - Create a server project following these instructions. Use the name
remotefor the new server project. - Right-click on the server project’s name and select
Sync config - In the Sync Config Dialog, see that in the top table
[inputs] filesis set to/tmp/inputs/files - Click that row and see that in the bottom table
[inputs] fileschanges to/tmp/inputs/files
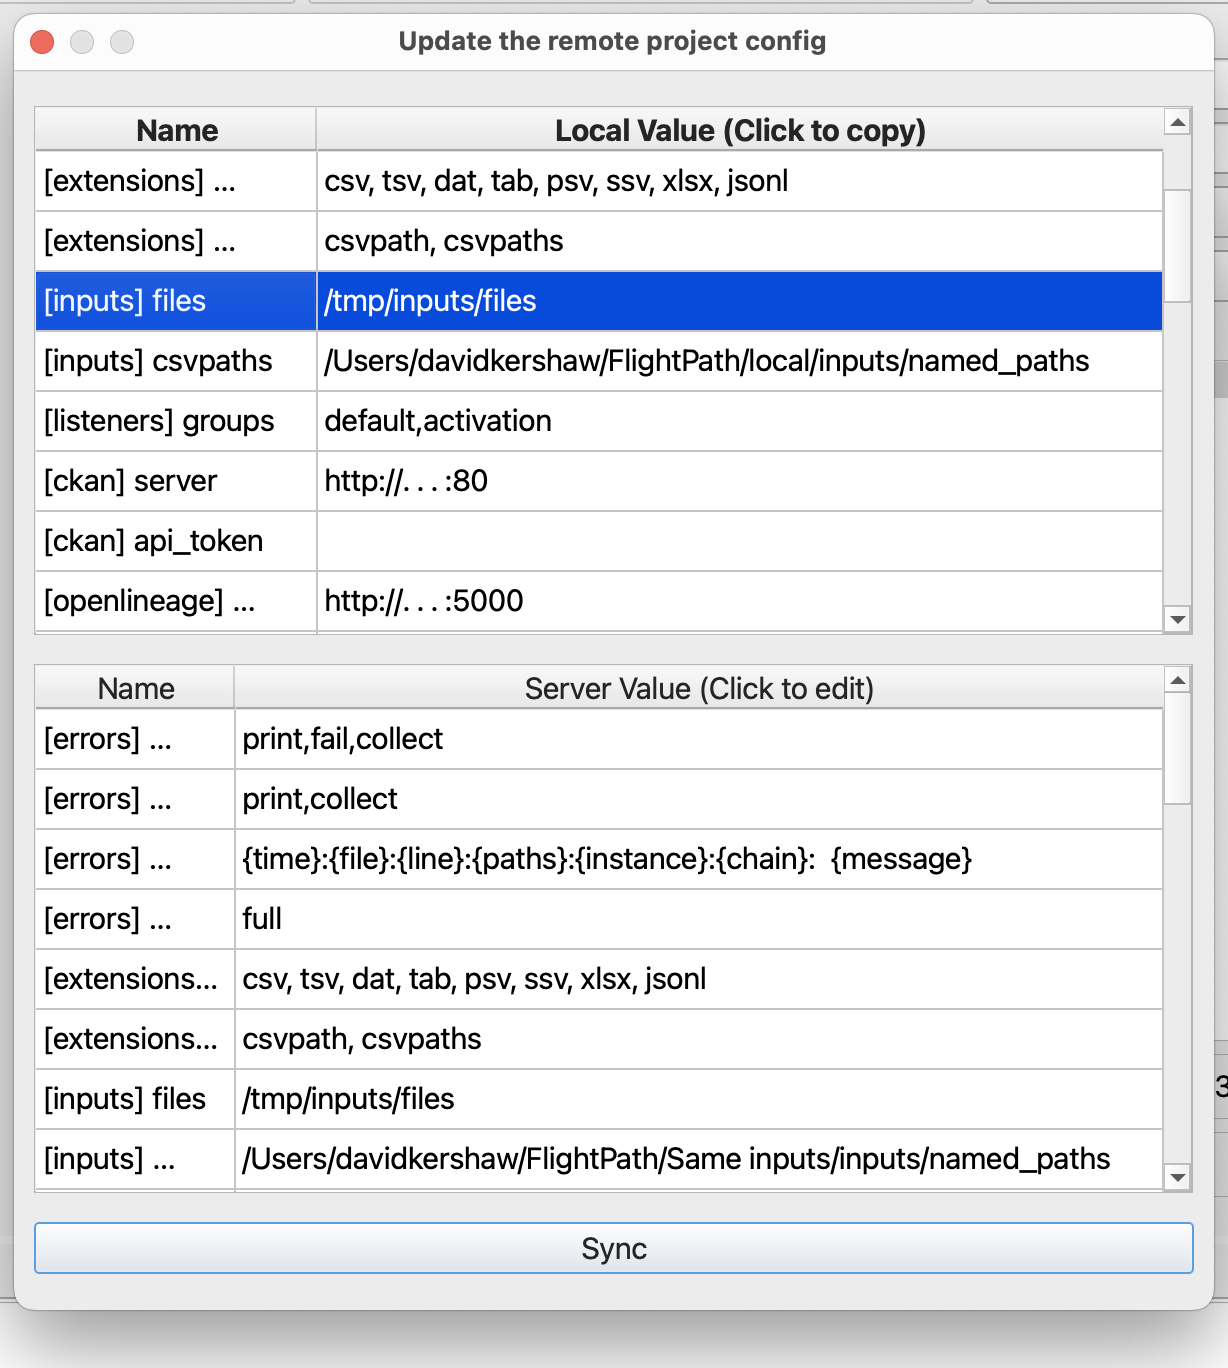
- Click
Syncto push the values in the lower table into the server project’s config.ini. The config change is immediately effective.